Your First with PlanNet
PlanNet is a powerful network planning and visualization tool that helps you design, manage, and document your network infrastructure. This guide will walk you through the basic steps to get started with your first project.
Creating Your First Project
1. Start a New Project
When you first launch PlanNet, you'll see the Last Projects screen with options to manage your projects.
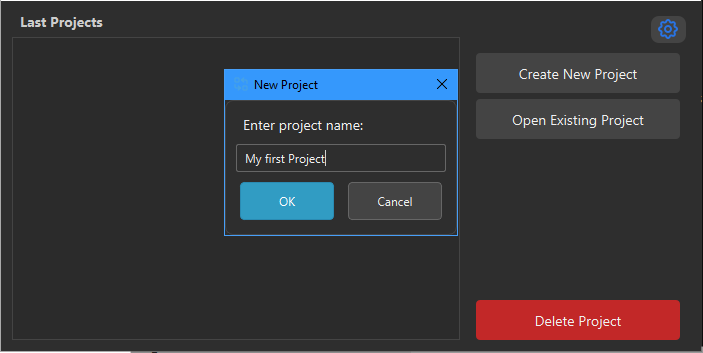
- Click the Create New Project button
- In the "New Project" dialog, enter a descriptive name for your project (e.g., "My first Project")
- Click OK to create the project
2. Project Workspace Overview
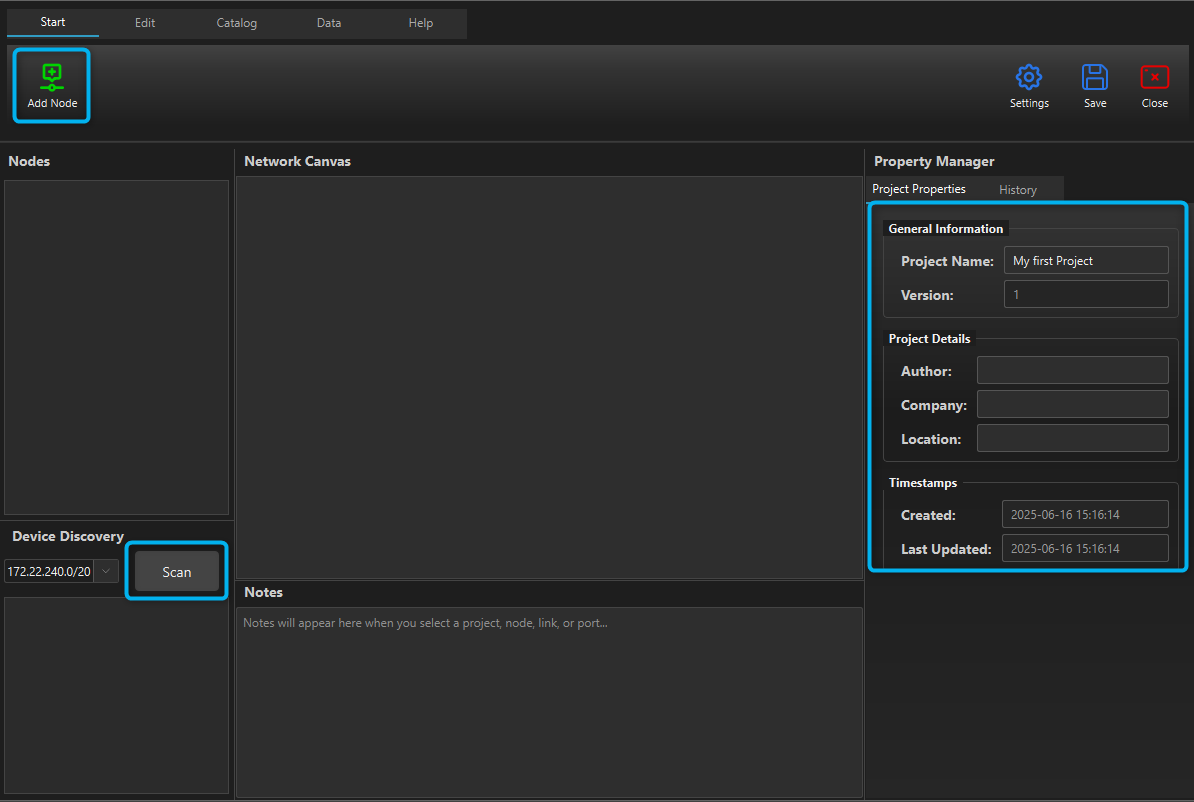
Once your project is created, you'll enter the main workspace which consists of several key areas:
- Toolbar: Contains tools for adding nodes, editing, accessing your catalog, managing data, and the help section
- Nodes Panel: Lists all network devices and links in your project
- Network Canvas: The main design area where you'll build your network topology
- Property Manager: Displays and allows editing of properties for selected items
- Device Discovery: Tools for scanning and discovering network devices
- Notes: Area for project documentation and notes
Property Manager: Project Details: - Author: Your name or team - Company: Organization name - Location: Physical location of the network
Adding Network Devices
1. Add Your First Device
- Click the Add Node button (green plus icon) in the toolbar
- This will add a new device to your network canvas
- The device will appear in both the canvas and the Nodes panel
2. Configure Device Properties
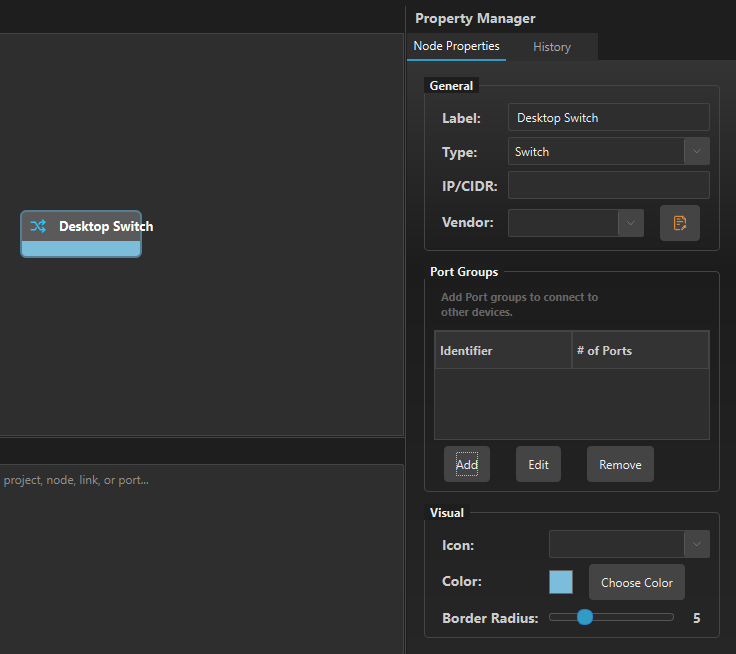
When you select a device, the Property Manager will display its configuration options:
General Information: - Label: Give your device a descriptive name (e.g., "Desktop Switch", "Firewall") - Type: Select the device type (Switch, Firewall, Router, etc.) - IP/CIDR: Configure the device's network address - Vendor: Specify the manufacturer
3. Add Port Groups
Network devices need ports to connect to other devices:
- In the Property Manager, scroll to the Port Groups section
- Click the Add button to create a new port group
- Configure the port group properties:
- Port Type: Select the connector type (e.g., RJ-45)
- Amount: Number of ports in the group
- Port Numbering: How ports are numbered (top-left→down→right)
Layout Options: - Row Sorting: Arrange ports in rows - Row Span: Control how many ports per row - Use the Layout Preview to see how ports will be arranged
- Click OK to add the port group
4. Visual Customization
In the Visual section of the Property Manager, you can customize: - Icon: Choose an appropriate icon for the device type - Color: Set a color scheme for easy identification - Border Radius: Adjust the visual appearance of the node
Network Links
1. Connect Devices
- Add multiple devices to your canvas using the Add Node button
- Ensure each device has appropriate port groups configured
- Click and drag from a port on one device to a port on another device to create a link
- The link will appear as a line between the devices.
2. Network Topology
As you add more devices and connections, your network topology will take shape on the canvas. You can: - Drag devices to reposition them - Modify links by right-clicking on them to enable edit mode and add waypoints to adjust the path - Sort the nodes in the nodetree by dragging and dropping them into the desired order
Device Discovery
For existing networks, PlanNet includes device discovery tools:
- In the Device Discovery panel, select one of the networks your computer is connected to, or choose "Other..." to enter an IP range (e.g., "10.20.40.0/24")
- Click Scan to discover devices on your network
- Discovered devices can be added to your project canvas
Undo & Redo functionality - The History Tab
Use the History tab in the Property Manager to go back to any point in the current editing session. This allows you to undo or redo changes made to your project.
Next Steps
Now that you've created your first project and added some devices, you can: - Add devices to the Catalog for later use as device templates - Experiment with different device types and connection patterns
For more detailed information on specific features, refer to the other sections of this documentation.